A layered lighting plan you can build room by room
Build a three-layer lighting scheme with the right colour temperature, switching and lamp positions, starting with what you can change this weekend.
A single ceiling light in the middle of the ceiling is the reason many rooms feel flat, clinical and slightly unwelcoming after dark. Fixing it rarely needs an electrician on day one. This guide sets out the three lighting layers, the colour temperatures and control choices that make them work, and a room-by-room plan you can build in stages, plug-in first and hard-wired later.
The three layers and what each one is for
Ambient light
Ambient light is the general wash that lets you cross the room safely and read faces. It does not have to come from the ceiling. Uplighters bouncing off a pale ceiling, wall lights, or two or three tall lamps around the perimeter all produce ambient light with far less glare than a single downward fitting.
The problem with the lone central pendant is not brightness, it is direction. One high source directly overhead casts hard shadows under eyes and leaves the room's corners dark, which visually shrinks the space.
Task light
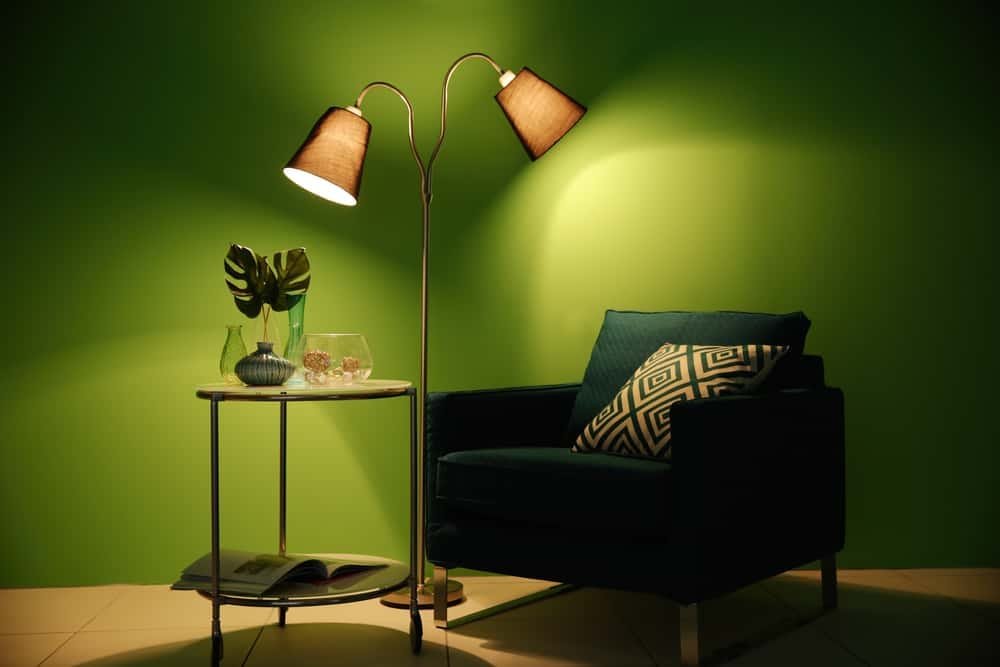
Task light is the pool you need for a specific job: chopping, reading, shaving, applying makeup, sewing, homework. It has to be positioned so your own body does not shadow the work. For a reading chair, that means the light source sits beside and slightly behind your shoulder, with the bottom of the shade at roughly seated eye level, commonly around 1.0–1.2m (39–47") from the floor.
Accent light
Accent light is what stops the room reading as a lit box. It picks out a painting, a bookshelf, a plant, a textured wall. Accent light is also the layer people skip, and it is the cheapest way to add apparent depth. A single small spot or a picture light on one wall does more for the mood of a room than doubling the ceiling output.
:::tip A good test at night: switch off the ceiling light. If the room still works with lamps alone, your layers are doing their job. If it goes gloomy, you are missing ambient sources at low and mid height. :::
Colour temperature, brightness and rendering
Kelvin, in plain terms
Colour temperature is measured in kelvin (K). Lower numbers are warmer and yellower, higher numbers cooler and bluer.
| Range | Character | Sensible use |
|---|---|---|
| 2200–2400K | Deep amber, candle-like | Decorative bulbs, evening accents, bedside |
| 2700K | Warm white, close to old incandescent | Living rooms, bedrooms, hallways, dining |
| 3000K | Warm but crisper | Kitchens, bathrooms, task areas, joinery strips |
| 4000K | Neutral white | Garages, utility rooms, workshops |
| 5000K+ | Cool, daylight-like | Rarely appropriate in a home living space |
The single most useful rule is consistency. Mixing 2700K and 4000K bulbs in the same room reads as a fault, not a choice. Pick one temperature per room, and if you want a warmer feel in the evening, get it from dimming or from lower-output decorative fittings, not from a different kelvin value on the same circuit.
Lumens, not watts
Wattage tells you consumption, not output. Compare bulbs by lumens. A traditional 60W incandescent produced roughly 700–800 lumens, which is why LED packaging so often quotes that figure as its equivalent. Rather than calculating a total for the room, count sources: most living rooms feel right with five to seven separate light sources at different heights, each modest, rather than two very bright ones.
Colour rendering
CRI (colour rendering index) describes how faithfully a light source shows colour, on a scale to 100. Cheap LEDs at the low end make skin, timber and paint look muddy. Look for a CRI figure in the 90s where colour matters: kitchens, bathrooms with mirrors, wardrobes and anywhere you have chosen paint carefully. This is directly relevant when you are testing colours, as covered in the paint colour and sheen guide.
Control, switching and dimming
Layers only work if you can use them separately. That is a switching question, and it is the part most renovations underspecify.
Circuit planning during works
If walls are open, this is the cheap moment to do it. Ask for:
- Separate switched circuits for ceiling, wall lights and any joinery lighting.
- Switched sockets at lamp positions, controlled from the room entrance, so table lamps come on with a wall switch.
- Two-way switching at both ends of a corridor, at the top and bottom of stairs, and at the bedroom door plus the bedside.
- Dimmers on the living, dining and bedroom circuits. Kitchens benefit too, since the same room does homework at 18:00 and wine at 22:00.
Getting this on the drawing before first fix costs comparatively little; adding a circuit after plastering means chasing walls and making good, which is where the real expense sits. The sequencing logic is set out in renovation order of work.
:::warning Not every LED lamp dims, and not every dimmer suits LEDs. You need a trailing-edge dimmer rated for LED loads and lamps marked dimmable, ideally from a single brand across one circuit. Mismatches cause flicker and buzzing. Any new or altered fixed wiring should be done by a qualified electrician and certified. :::
If you cannot rewire
Plenty of control is available without touching the fixed installation:
- Smart bulbs in existing fittings, grouped into a scene, controlled from a wall-mounted battery remote.
- Plug-in smart sockets under table lamps, so all the lamps in a room come on together.
- Inline foot dimmers on floor lamp flexes.
- Rechargeable, cordless table lamps for spots with no socket, such as a dining table or a windowsill.
This is a large part of what makes rented homes feel finished, alongside the ideas in rental-friendly upgrades you can undo.
Room-by-room specifics
Kitchens
Under-cabinet lighting is the highest-value fitting in the house. Without it, you stand between the ceiling light and the worktop and chop in your own shadow. Run a continuous strip or a line of small pucks along the front underside of the wall units, mounted towards the front edge so the light falls on the work surface rather than up the splashback.
Keep general kitchen lighting off the ceiling centre and spread across the working zones instead. Over an island, hang pendants with the bottom of the shade roughly 750–900mm (30–36") above the worktop, which clears sightlines while still lighting the surface.
Dining
Hang a pendant so the shade bottom sits around 750–850mm (30–33") above the table top. Any lower and tall guests knock it; much higher and the pool of light spreads too thin. Centre it on the table, not the room, and put it on a dimmer.
Bathrooms
You need shadow-free light at the mirror, which means light from the sides at face height rather than a single downlight above. Two wall lights flanking the mirror at roughly 1.6–1.7m (63–67") to centre, or a vertically diffused fitting each side, beat any overhead arrangement for shaving and makeup.
Fittings in bathrooms must be rated for the zone they sit in, which is a genuine safety requirement rather than a preference. There is more context in bathroom ventilation and waterproofing.
Bedrooms
Bedside light should be controllable without getting up and should not spill across the other pillow. Wall-mounted adjustable arms free the bedside table and put the light where a book actually is. Keep the top of the shade below eye level when sitting up in bed, and avoid anything cooler than 2700K near the bed. The reasoning is expanded in bedroom design for better sleep.
Hallways and stairs
Even, low-glare light beats brightness. Wall lights at intervals feel more generous than a row of downlights, and they light faces rather than the tops of heads. Stairs need light on the tread edges without dazzling anyone descending, so keep sources off the direct sightline of someone at the top.
A staged plan you can follow
- This weekend. Swap every bulb in one room to a consistent 2700K with a high CRI figure. Add two lamps at different heights. Turn the ceiling light off and see how it reads.
- Next month. Add accent light: one picture light, one small uplighter behind a plant, or a battery-operated bar inside a bookcase.
- Next quarter. Add under-cabinet lighting in the kitchen and a proper task lamp at every place someone actually works.
- At the next disruption. When walls or ceilings are open for any other reason, add circuits, dimmers and switched sockets. Never open a wall twice.
:::budget Lighting is the rare category where the cheap version of the right idea beats the expensive version of the wrong one. Three modest lamps on separate switches outperform one designer pendant, usually for a fraction of the outlay. :::
The short version
- Build every room from three layers: ambient, task, accent. Most homes are missing the last two.
- Standardise on 2700K for living and sleeping spaces, 3000K for working ones, and do not mix within a room.
- Choose bulbs by lumens and CRI, not watts, and buy dimmable lamps with a matching LED-rated dimmer.
- Separate switching is what makes layers usable. Get circuits on the plan before first fix.
- Under-cabinet lighting in the kitchen and side-lit bathroom mirrors solve the two worst shadow problems in the house.
- With no rewiring possible, smart bulbs plus plug-in switching gets you most of the way.
Written by
The HDI Editorial Desk
Editorial team
Research, drawings and fact-checking for every guide on Home Designing Idea.
Get the next one by email
One considered piece every other Thursday. No affiliate links.
Keep reading

7 Ways to Level Up Your Home to Be Talk of Your Friends
Like most people, you've probably been spending more time at home in the past year. And you might have realized that it's time you improved the look of your interior space. The good news is that you…
How to Be More Productive when Working from Home
In an era where you can work from anywhere, you ought to make sure that your home office is maximally productive. This allows you to achieve your various objectives and avoid distractions. Lack of…
How to mix textures and patterns without the chaos
Combine pattern scales, weaves and finishes using a workable ratio system so a room reads as layered and considered rather than busy.
Be the first to comment
Loading the thread…